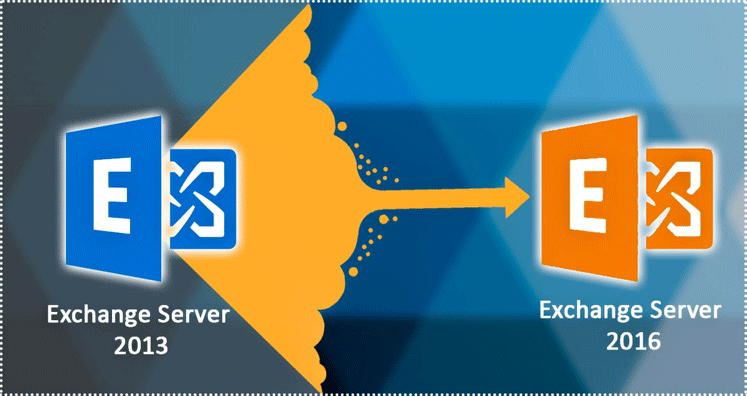
Users get into the need of migrating Exchange server from 2013 to 2016 and here is the complete guidance:
How Exchange 2016 is better than Exchange 2013?
If you have decided to move from MS Exchange server 2013 to Exchange server 2016 environment then there must be some reason behind this. Let’s find out why there is an inclination for Exchange Server 2016:
- MS Exchange Server 2016 comes with technically advanced features as well as services for better-emailing communication.
- It provides better data security features as compared to Exchange 2013.
- It also offers better integration to the cloud.
- Besides this, Exchange 2016 is well-suitable to fulfill large organizational emailing needs.
- It is a cost-effective way for organization-runners
- Exchange 2016 is efficient than other available Exchange editions.
Two Servers in Exchange 2016: Microsoft® Exchange 2016 plays two server roles:
- Mailbox Server Role
- Edge Transport Server Role
Mailbox Server Role: Under this, it performs two important functions of MS Exchange 2013 which include – Mailbox Server role and the Client Access Server role. Here, the Mailbox Server role performs crucial functions such as mailbox databases, transport services, backend client access protocol, and Unified Messaging services.
Edge Transport Server Role: Edge Transport Servers installed in the network area as it keeps the eye on mail flow in the work environment. It provides security to the messages sent/receive by tackling issues such as viruses, spam, and faulty email flow.
Let’s start the migration process but before that install MS Exchange Server 2016 and then start migrating data from Exchange Server 2013 to 2016.
Form the Environment: Before you begin the EDB migration process, it is important to create the environment so that you won’t face any complications in connection to the system requirements. Soon after that, go through the release notes so that you won’t come across post-migration problems. Check the availability of storage space, CPU, RAM so that server can perform the migration process smoothly.
Another thing to keep in mind, whether the clients are compatible with the MS Exchange server 2016. In case, they are not supportive then quickly upgrade. In this regard, install the upgraded Operating System such as Windows Server 2012 Standard/Datacenter or Windows Server 2012 R2 Standard/Datacenter. Here, we are using Windows Server 2012. Once the Windows installed, join the Exchange to the domain. Once you have created the environment, start installing Exchange Server 2016.
Install Prerequisites along with MS Exchange 2016
Install MS Exchange server 2016 along with the following prerequisites:
- .Net 4.5.2
- Windows Management Framework 4.0
- Unified Messaging Communications Managed API 4.0 Runtime
- Windows features and for this, run the following PowerShell command for installing the Windows features.
Here are some Windows features recommended to be installed:
Install-WindowsFeature AS-HTTP-Activation, Desktop-Experience, RSAT-Clustering, NET-Framework-45-Features, RPC-over-HTTP-proxy, RSAT-Clustering-CmdInterface, RSAT-Clustering-Mgmt, RSAT-Clustering-PowerShell, Web-Mgmt-Console, WAS-Process-Model, Web-HTTP-Redirect, Web-Asp-Net45, Web-Basic-Auth, Web-Client-Auth, Web-Digest-Auth, Web-Dir-Browsing, Web-Http-Errors, Web-Http-Logging, Web-Http-Tracing, Web-ISAPI-Ext, Web-Dyn-Compression, Web-Stat-Compression, Web-ISAPI-Filter, Web-Lgcy-Mgmt-Console, Web-Static-Content, Web-Metabase, Web-Mgmt-Service, Web-Net-Ext45, Web-Request-Monitor, Web-Mgmt-Console, Web-Server, Web-Windows-Auth, Web-WMI, Windows-Identity-Foundation, RSAT-ADDS.
Install MS Exchange Server 2016
Once you are ready with the requisites, install MS Exchange server 2016 and the steps to do this are as follows:

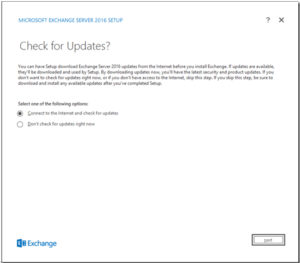
- To install MS Exchange server, Begin with downloading and extracting the Exchange Server 2016 setup file. Now, run the Exchange Setup (Setup.exe) for installing the Exchange, choose the first option, and press ‘Next’.
- The Exchange Set will install the updates. Press on Next to move further. Here the Setup will prepare a copy of the required files and begin with the installation. And once you find the Introduction page click Next for another step.
- You will now find The License Agreement page on the screen and you will accept the license. Now, press Next to move further.
- Choose Recommended Settings and press Next.

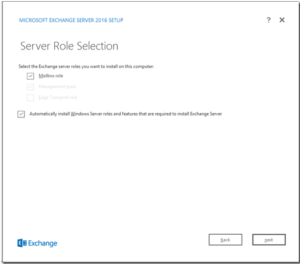
- Choose the server role page will appear on the screen and soon after that select ‘Mailbox Role’ and after that press Next.

- Choose the location to install the software. Use the browse button to choose the location for installing the software.
- In the proceeding step, choose whether you are willing to acquire Malware Protection Settings. Though by default, the settings are enabled which you can disable as well.
- Once you have done all this, the Setup will automatically check the PC and prerequisites. Side by side, the installation will continue to take place and lastly, the window will pop up informing about the successful completion of installation.
Configure Service Connection Point (SCP)
SCP, shortened for Service Connection Points referred to the Objects mentioned in the Active Directory contains information regarding all services. It will guide the
Outlook clients to the URL to fetch auto-discover settings. And this feature is the FQDN of the Exchange server. Make it a point that SCP should be configured to refer to MS Exchange Server 2013 endpoint.
In the Nutshell:
The blog provides deep information about migrating MS Exchange Server from 2013 to 2016. This part of the blog informs us to create an environment to meet the prerequisites before migrating to Exchange 2016. It also makes us aware of the installation of Exchange Server 2016 and the configuration of SCP.
