Gmail is one of the commonly used web-based email clients which is very popular among users. The email service is available for home users as well as business users. It is free up to storage of 15 GB data and above it, you need to pay for it. Office 365 is another cloud-based email service that is paid and generally used by organizations. When users felt a need to move Gmail data to Office 365, it seems to be tough for the users which have been made easier for those users with the help of this article where we have come up with solutions for this migration.
Exporting Gmail to Office 365 Manually
Get step by step solution to learn to move Gmail data to O365 manually with the following steps –
- Firstly, login to the required Gmail account. Click on My Account and then on click on Sign-in & security.
- In the Sign-in & security window, go to Apps with account access and turn on allow less secure apps.
- Then, enable IMAP in Gmail account. For this, get the steps –
- Open your Gmail account and go to Settings
- Click on settings option and then go to Forwarding and POP/IMAP
- Check on enable IMAP and save changes
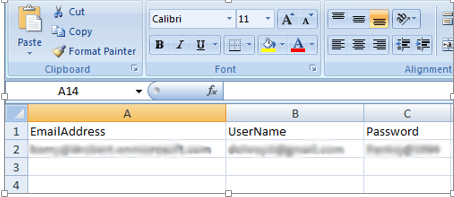
- Now create a CSV file with an email address, username and password of Gmail account in it.
- Then, open Office 365 account
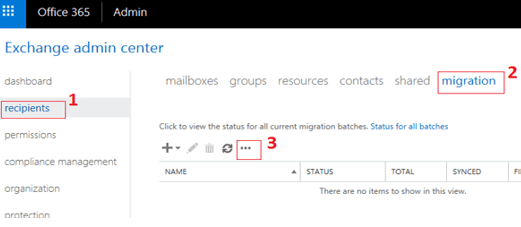
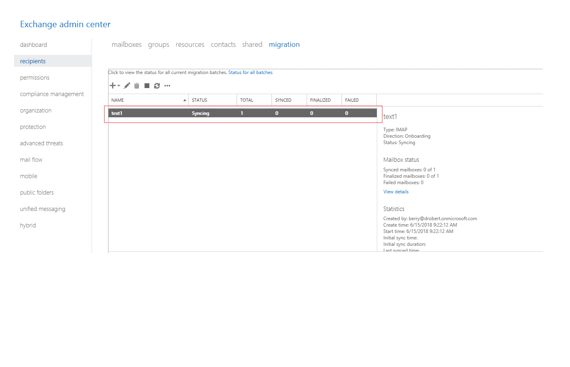
- Go to Admin Center and then on Exchange option
- Go to Recipients and select migration
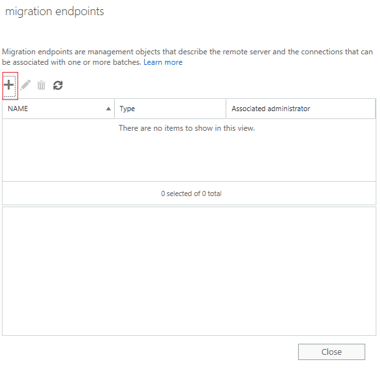
- After that, click on “+” sign in the opening wizard.
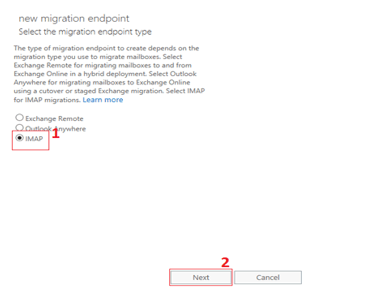
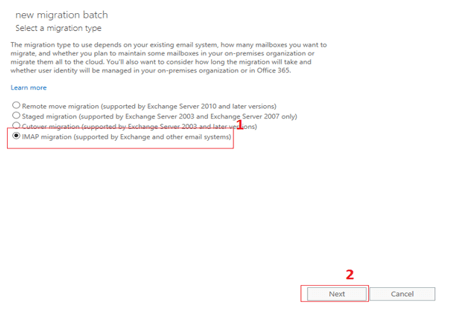
- A new window will pop-out. Check on IMAP and click Next.
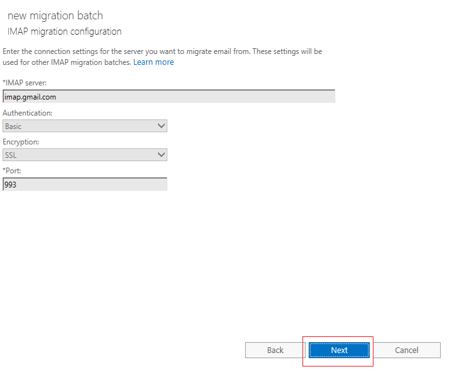
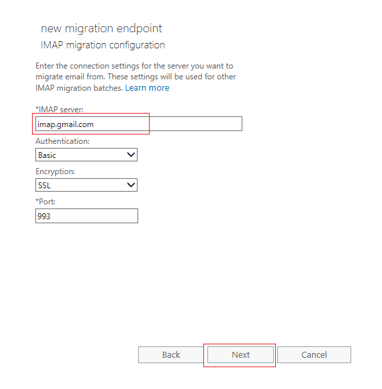
- Type IMAP Server like imap.gmail.com and click on Next.
- In the next pop-up, type migration endpoint name and click on New option. Then, click on the Close button.
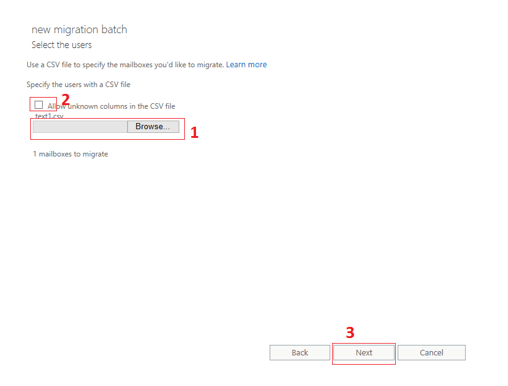
- Go to the Browse button and upload the CSV file. Check on Allow unknown columns in CSV file and click Next.
- In the next window, click on Next and again Next. Click New.
- When it is completed, you will get a notification on your Gmail. You can check your office mailbox, you will get Gmail emails in it.
Transfer Gmail emails into Office 365 with the software solution
Get an alternate solution to move Gmail data to Exchange Online with the software solution. Get these steps with Gmail Backup Expert by Datavare The software migrates Gmail emails into PST format which can be easily imported in O365 account.
- Launch the program on your Windows systems.
- Run the application and add username and password of Gmail account.
- Select Gmail picked folders or all folders for migration.
- Opt for Generate PST option.
- Specify an output destination to save the resultant files.
Once the users have saved Gmail files in PST format. Next step is to import PST file in Exchange Online or Office 365 –
- Download and install the Azure AzCopy Tool
- Provide Office 365 credentials and click on Data Management
- Click on Import option
- Select upload data over the network option
- Click on show URL to copy the Shared Access Signature
- Upload PST files to office 365.
Why prefer software solution over manual solution?
To know the reason, why most of the users prefer software solutions over manual solutions. We have shown the comparison here –
Software v/s Manual method
- The software solution is well-tested by the professionals so no data loss issues on the other hand, the manual solution is not tested at all for providing reliable results without any losses.
- The software takes only a few minutes to process the task but with a manual approach, it will take a long time due to various steps and time taken by the steps in processing.
- The manual solution can’t be performed without technical expertise but the software solution need not any technical skills.
Final Note
With this article, the users can easily analyze manual as well as third-party solution and can simply access Gmail files in Office 365 account. The task can be easily completed without any delays with the software solution. You can try a demo version of the utility without any cost.
